-
-
Slumber Logo
-
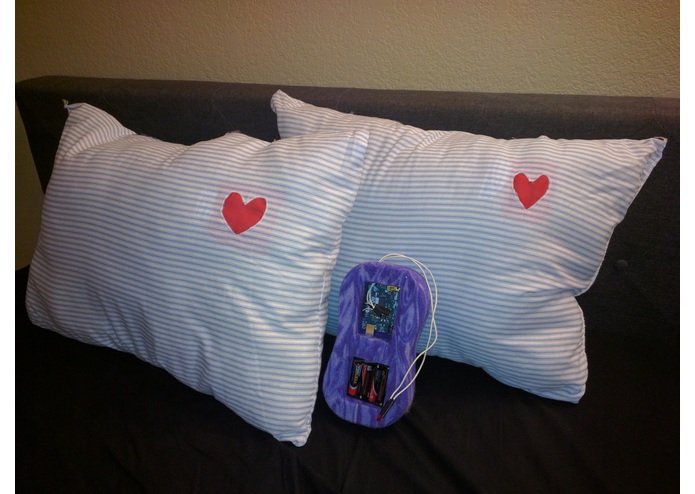
Two Slumber pillows side by side with Slumber module.
-
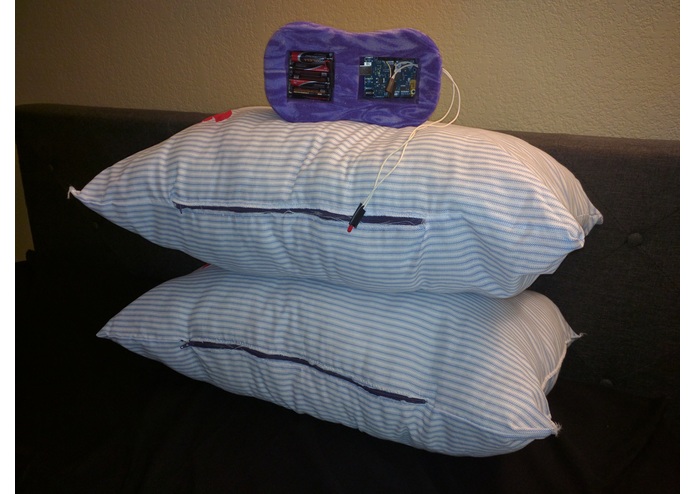
Two Slumber pillows stacked on top with Slumber module.
-
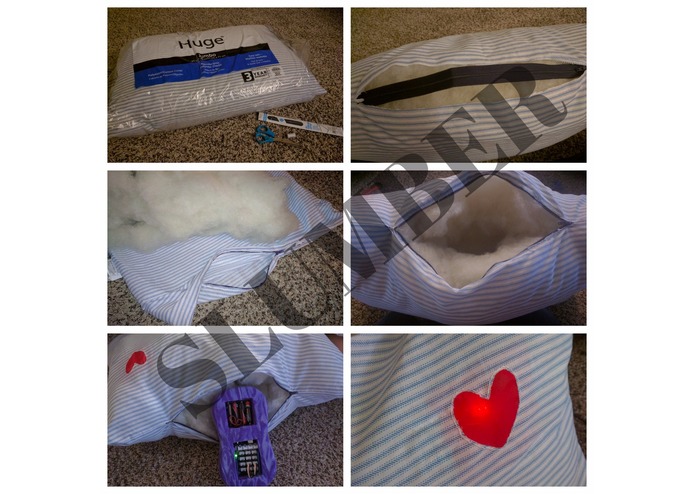
We built a pillow with a zipper for easy access to the Arduino 101 module.
-
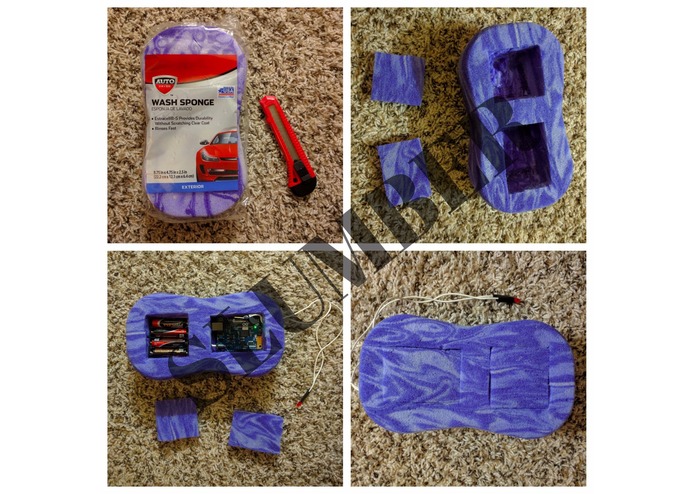
We modified a wash sponge to cradle the Arduino 101 & Battery Pack
-
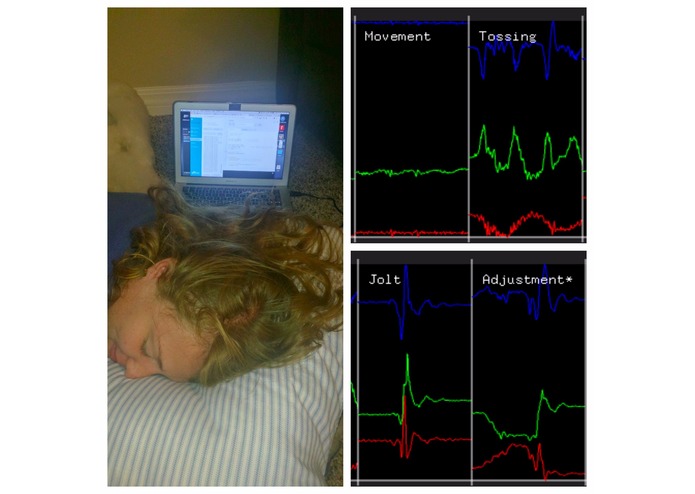
We used the gesture support app to classify/transpile sleep movements.
-
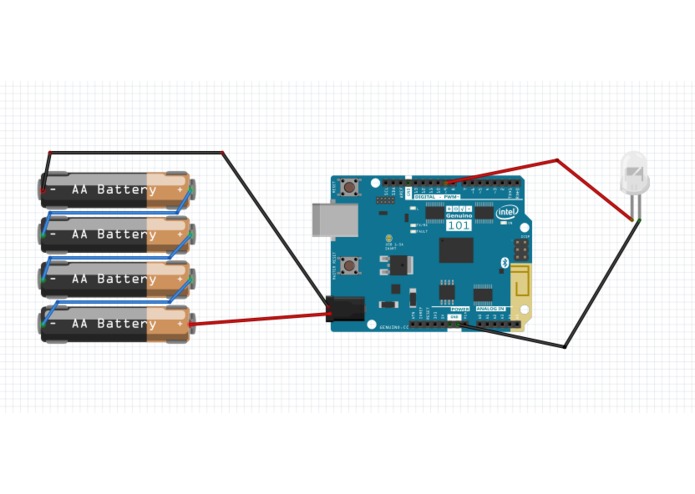
Electrical setup for the Slumber module.
-
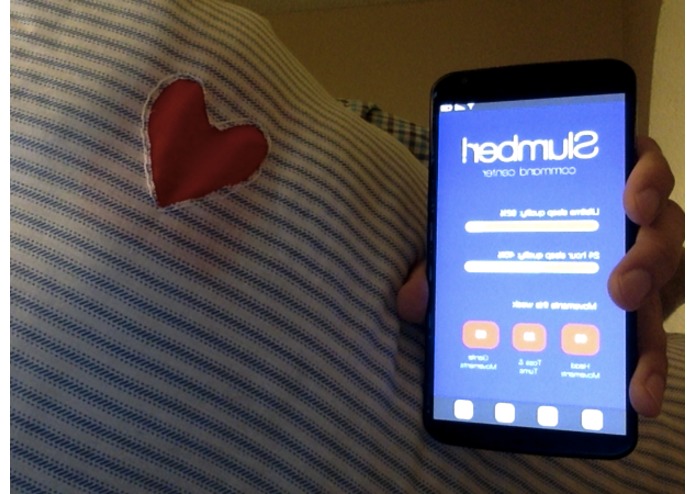
Android/iOS Mobile app prototype (in beta).


The Back Story + Inspiration
"The pillow is a PRIME target for the next big IOT application and SLUMBER wants to be a part of it!" - Zach Alam
Sleep is important. Extremely Important! You can go longer without eating than sleep. We wanted to build a non-intrusive way for individuals to "intelligently" monitor their Slumber. You don't need to cover your head or slap on a pesky bracelet: just rest your head on the pillow and get immediate feedback. The best news: anyone can build their own for just ~$20 (+ Arduino 101).
Introducing the Slumber Pillow

How It Works - Short Version
The Slumber Pillow uses 300+ pre-programmed patterns to diagnose and classify common sleep movements (like tossing & turning, head movements, and restlessness).
Users can get instant feedback from their sleep via two ways:
- Signals are broadcast (using Bluetooth LE) to the Slumber mobile app where users can review information about their sleep (like types of movement throughout the night).
- Users can shake the pillow (via the Accelerometer). The red heart will pulse depending on the quality of sleep (faster pulses = good sleep, slower pulses = poor sleep).
BONUS GIF: Heart Pulse Animations!! <3
Faster Pulse Animation: [http://i.imgur.com/Rf4HvNX.gifv] and Slower Pulse Animation: [http://i.imgur.com/uda3Jrb.gifv]
Build Info: The Pillow

Materials: Extra fluff pillow ($5), Sew-in Zipper ($2), Red Chiffron Fabric ($0.50), Needles & Thread ($1), Scissors
- Step 1: Using the scissors we cut the length of the Sew-in Zipper across the seam of the pillow.
- Step 2: Remove all Pillow stuffing, turn pillowcase inside out, pin sew-in zipper to freshly cut seam, then used needle and thread to fasten zipper to pillowcase.
- Step 3: Cut heart shape into top right hand corner of pillow & sew in red chiffron fabric .
- Step 4: Turn pillowcase rightside out. Return stuffing to pillow making sure that there is room in the center to add/remove
Slumbermodule.
Build Info: Slumber Module

Materials: Intel Arduino/Genuino 101, Thick Wash Sponge ($3), Red LED + Wire ($0.50), Battery Pack Holder ($2), 4-AA Batteries ($5), Box Cutter
- Step 1: Cut a shallow outline around the Arduino 101 and battery pack into the wash sponge.
- Step 2: Cut out the contents of the sponge so that the Arduino 101 and battery pack can be placed inside, Trim and save tops of cutouts (so that they can be used as covers later).
- Step 3: Cut a small gap between two sections (so power can be applied). Additionally cut a small slit in the side of the sponge so that LED can protrude from module.
Build Info: Schematic
The true hero of this entire project is the Curie chip. The majority of our project utilized the internal functionality provided by this chip (Gyroscope, Accelerometer, & Bluetooth LE support). Pro-tip, add a ~300 Ohm resistor in series to the LED to prolong it's life.

Build Info: Source Code
We used the gesture support app to find similarities and patterns between common movements. We then converted some of these patterns to code. The pre-programmed patterns do not care about the orientation direction - rather the speed at which the orientation changes. This makes it possible for Slumber to be used in any position. Link to INO source code file: [https://github.com/zachalam/slumber/blob/master/slumber.ino]

Build Info: Mobile App (prototype/beta)
For the individuals out there that want details about their sleep (we're talking numbers). We have developed an early stage mobile app (react native) that automatically detects the Bluetooth LE signals output by your Slumber pillow and shares them with you. More details coming soon (scheduled for App store release mid/late August).

Project Challenges
- Sensor "Creep": We originally had pressure, temperature, and sound sensors attached to our board (and even thought about adding more). In reality almost everything we needed could be done with Software (and the Arduino board/Intel Curie chip). Cutting out these sensors was hard: we wanted our project to have every bell and whistle. In the end we opted to keep it simple and easy to replicate.
- Making Our Case: We tried lots of material to cradle the Arduino 101 (putting it in a cardboard tube, wrapping it in felt, tying it in a bag). We finally got lucky walking past a bin of oversized sponges at the store and knew instantly this was the right material. The sponge provides adequate protection and is also compressible which makes it fairly nice to sleep on.
- Gathering/Bundling Sleep Data: We wanted a way to make
Slumbersmarter than a traditional sleep tracker (which only looks for restlessness). Gathering and analyzing the hundreds of micro sleep pattern movements was very meticulous (but fun and interesting at the same time!).
What's next for Slumber
This is just the start for Slumber. We want the average/everyday person to be more informed about their sleep. Here's a tentative schedule with our plans to get Slumber into everyone's hands.
- Release: How-To guide, Open source INO files, and build instructions. (July 25, 2017)
- Improvement: Updated sleep tracking algorithm (August 15, 2017)
- Release: Mobile App in Stores - iTunes & Google Play. (August 25, 2017)
- Release: Modified/Slim-line form factor with Curie chip - better battery life/less noticeable in pillow. (August 30, 2017)
- Crowdfund Campaign: Launch a campaign to offer Slumber Hardware - for those that do not want or cannot build their own with our opensource files. (September 10, 2017)
Built With
- arduino
- arduino-101
- ino


Log in or sign up for Devpost to join the conversation.